Before starting dissection it is always a good idea to make a photo
of the whole insect, to document colour, size ratio, and dusting. As
I prefer photos of fresh specimens and to remove the terminalia from
a freshly pinned specimen is risky (mesonotum can be easily
damaged), I use a folded piece of card and place the specimen on a
part of it which has the right slope to show it in proper side view.
The little disadvantage is, that the card itself becomes visible.
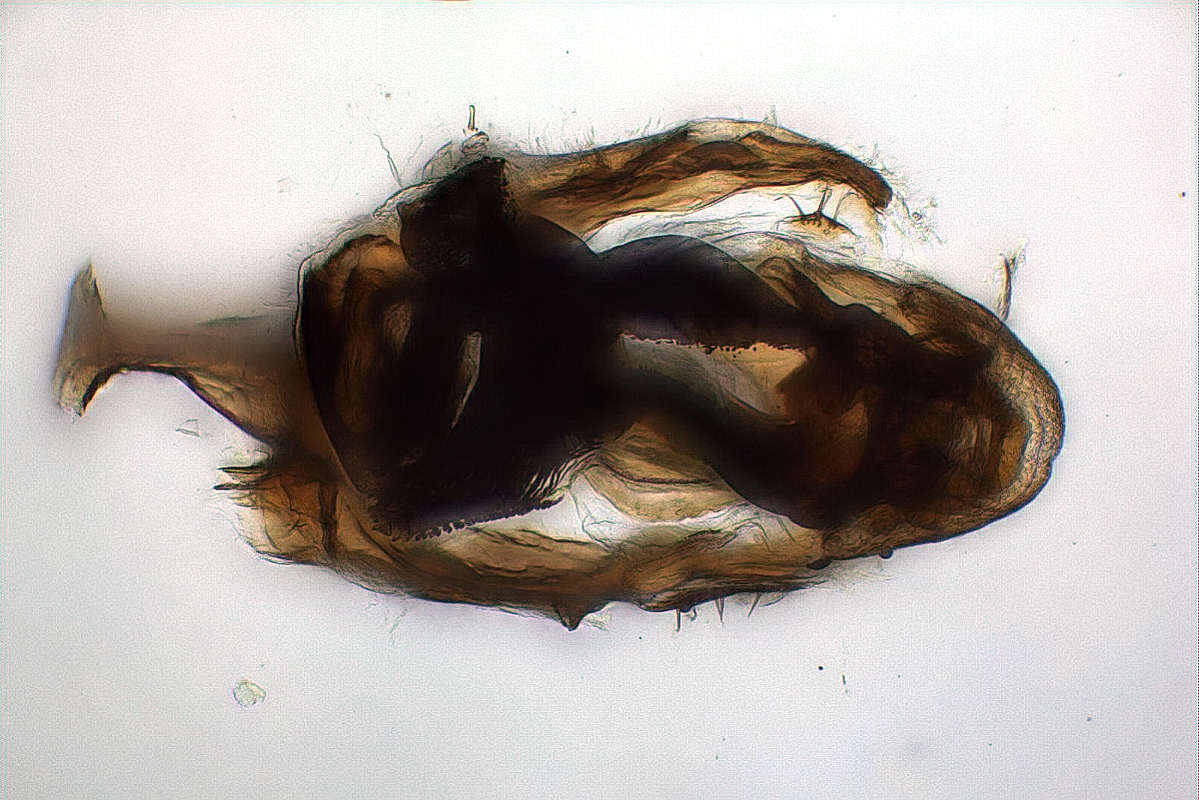
Then I press the fifth segment (the last small one above) together
from the side with Dumont forceps, pierce the acute scalpel into the
membranes before and separate the two parts slowly, or, sometimes it
is better to do just a quick cut. The termialia are cleared and
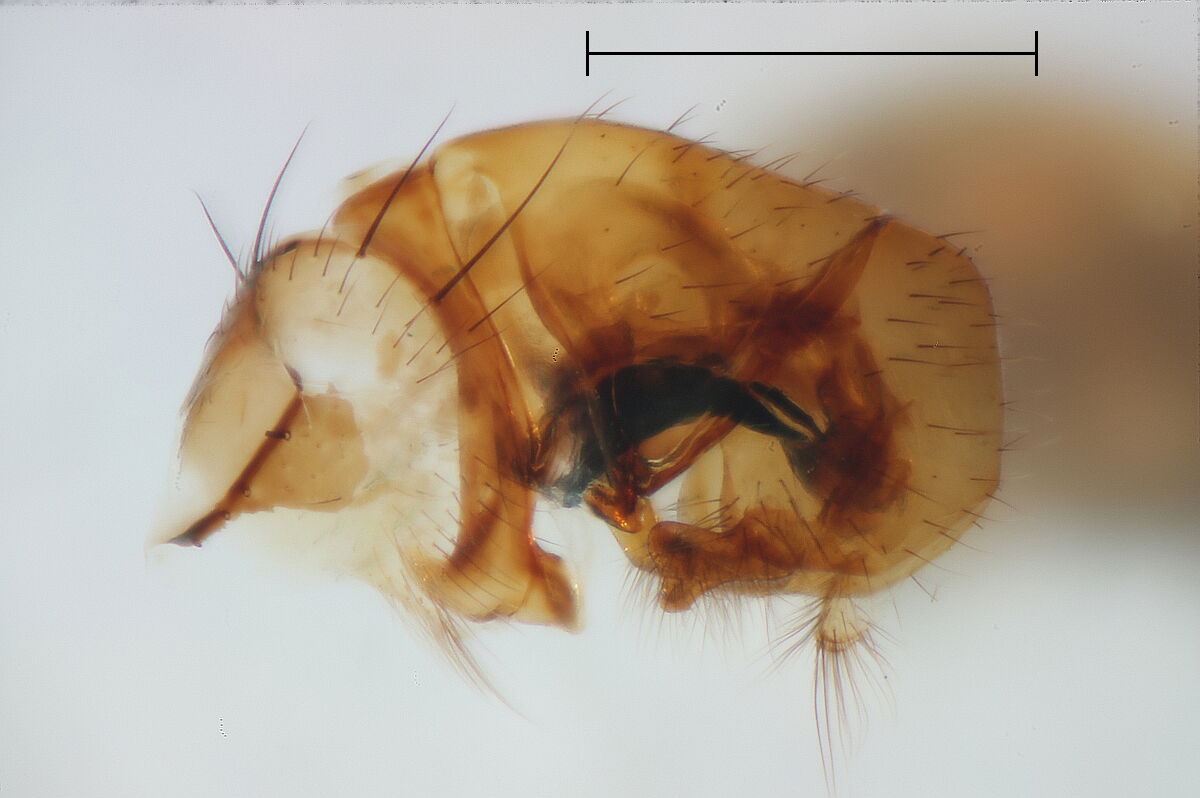
finally placed in glycerol, where they can be oriented. In the side
view below we can see that the sclerotized parts a partly
transparent, and we can see the anterior part of the hypandrium and
the black aedeagus inside. (We also see, that the first dissection
step was not 100% successful, I damaged the 4th segment.)
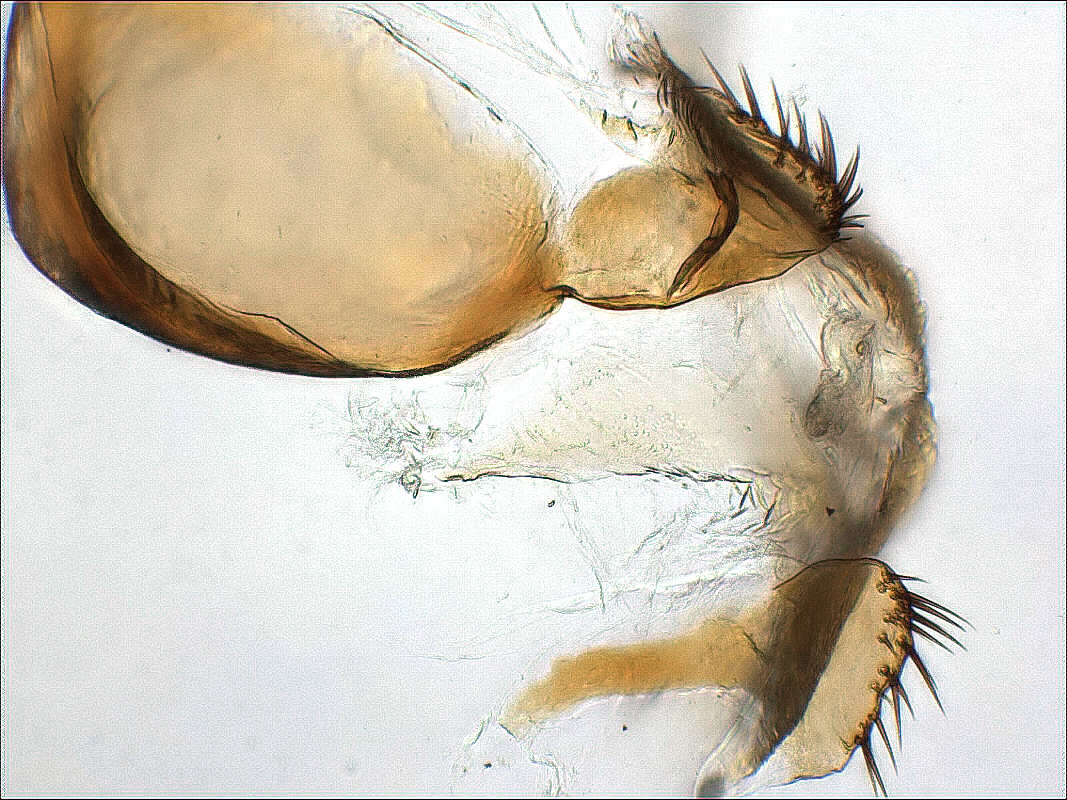
The next step is to pull out epandrial/hypandrial complex from the
segments before. We insert a blunt pin from the left, press the
whole object down to the glass bottom, and pierce the acute scalpel
dorsally (in the photo from above) into the membrane before the
epandrium (the rightmost segment), and try to pull out the whole
complex with the flat side of the scalpel. If we are lucky the
membrane connecting the hypandrium with the sternite before is
either already sufficiently cracked or it is weak enough, that we
can pull out the complex completely. Otherwise we have to pierce it
with the scalpel until it is weak enough.
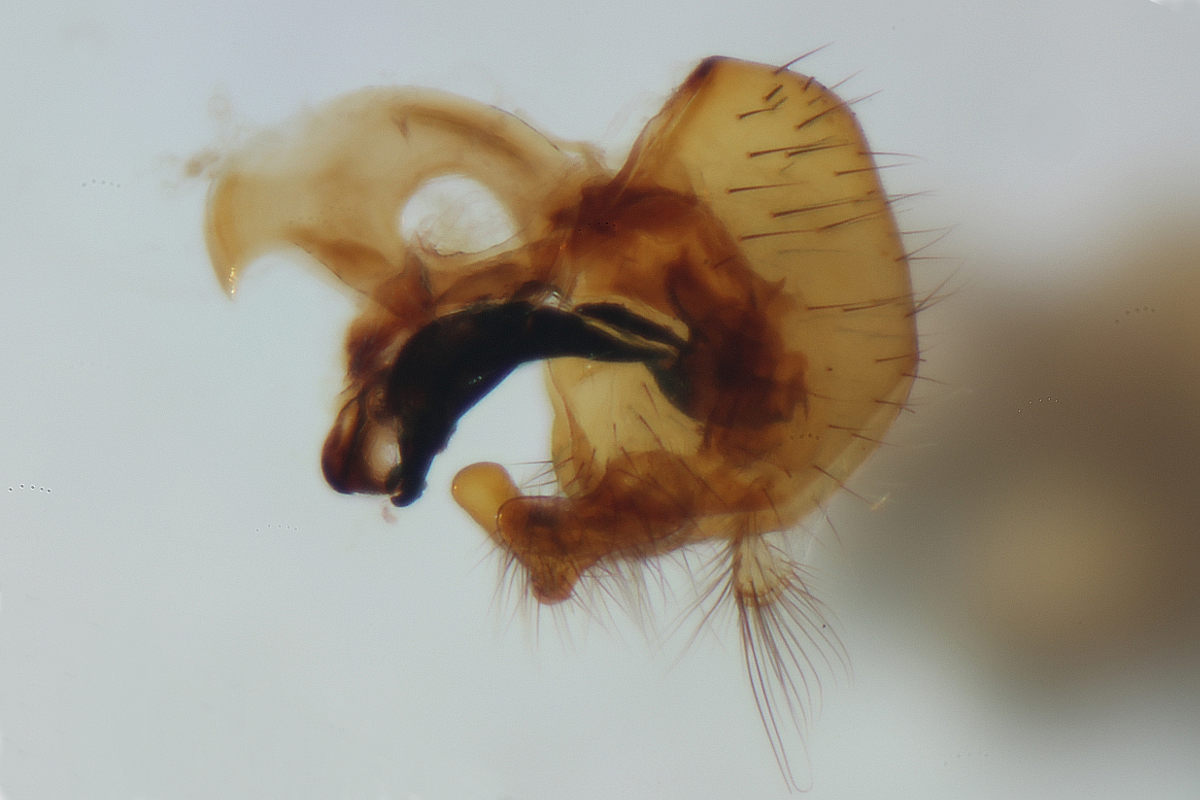
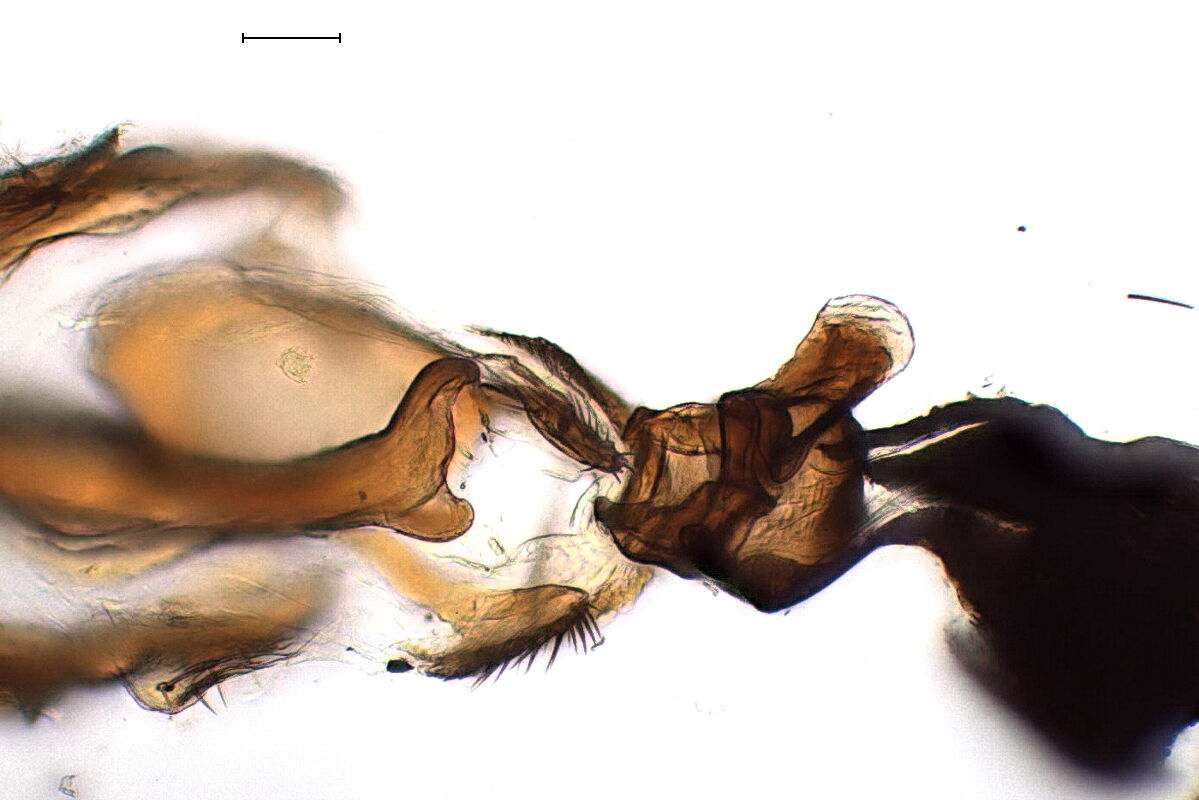
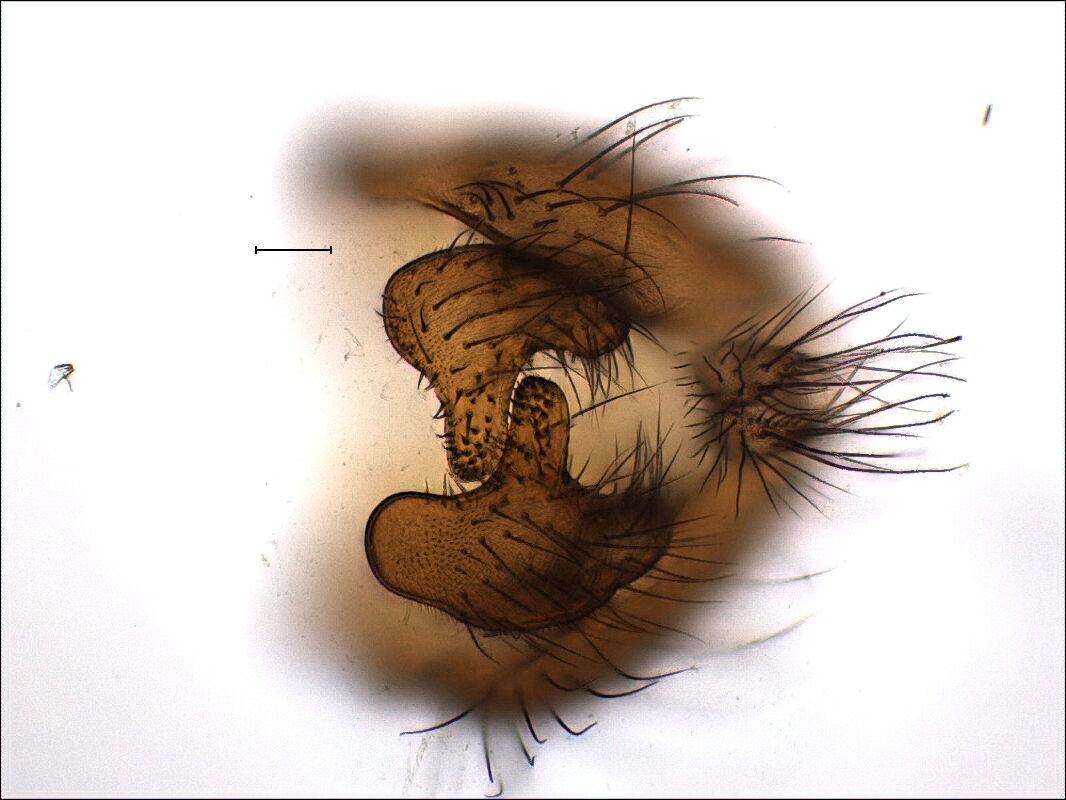
In the next step we separate the hypandrium (on the left) from the
epandrium (on the right). There are two junctions we have to
separate: the hypandrial arms are connected to the anterior middle
part of the epandrium and the bacilliform sclerites connect the
posterior part of the hypandrium with the surstyli. We first insert
a blunt pin from the upper left and press the dorsal (upper) side of
the epandrium down to the bottom with a blunt pin and insert the
acute scalpel between the hypandrial side arm and the epandrium. I
usually have to repeat that several times, slightly reorienting the
object, immediately stopping when I see something goes wrong, until
both sides are separated and the two parts are movable against each
other. In this group the bacilliform sclerites are connected to the
hypandrium only by a weak membrane, and it is enough to pierce it
once in the middle, and the hypandrium can be pulled out. The
bacilliform sclerites will remain completely in the epandrium, as
shown on the right side below. Now the parts are small enough to
make photos with the compound microscope. For a photo showing the
location of the joints between epandrium and hypandrium, see the next example.
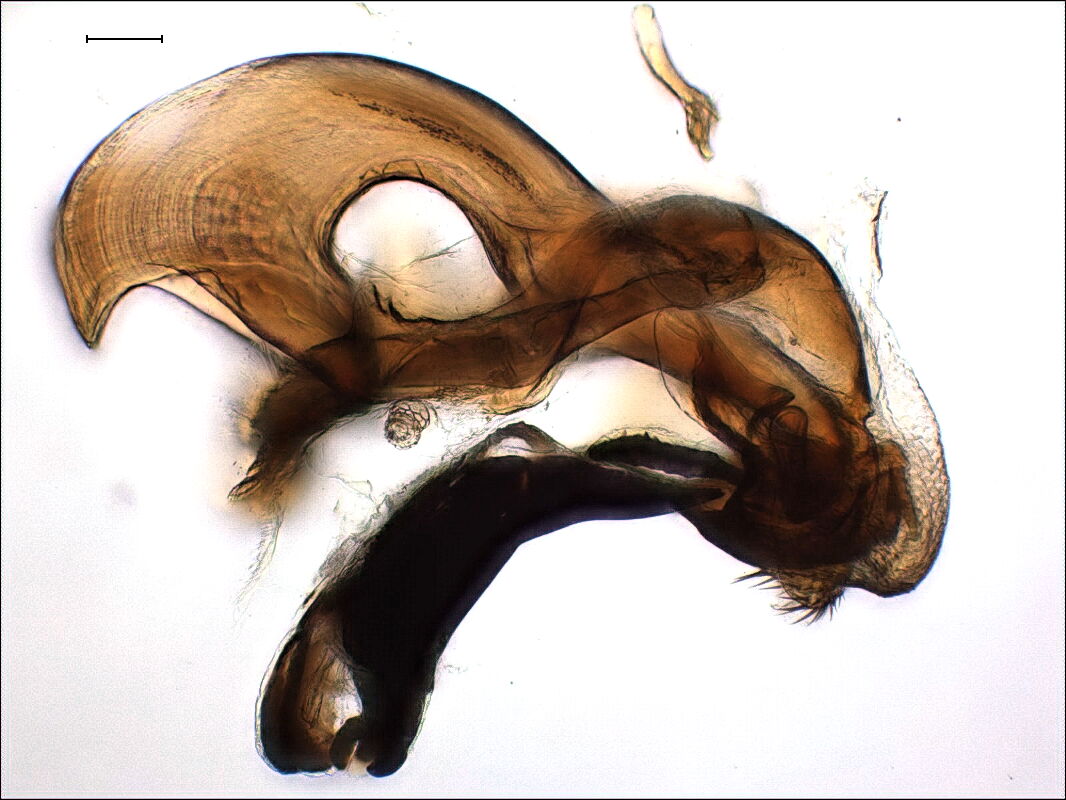
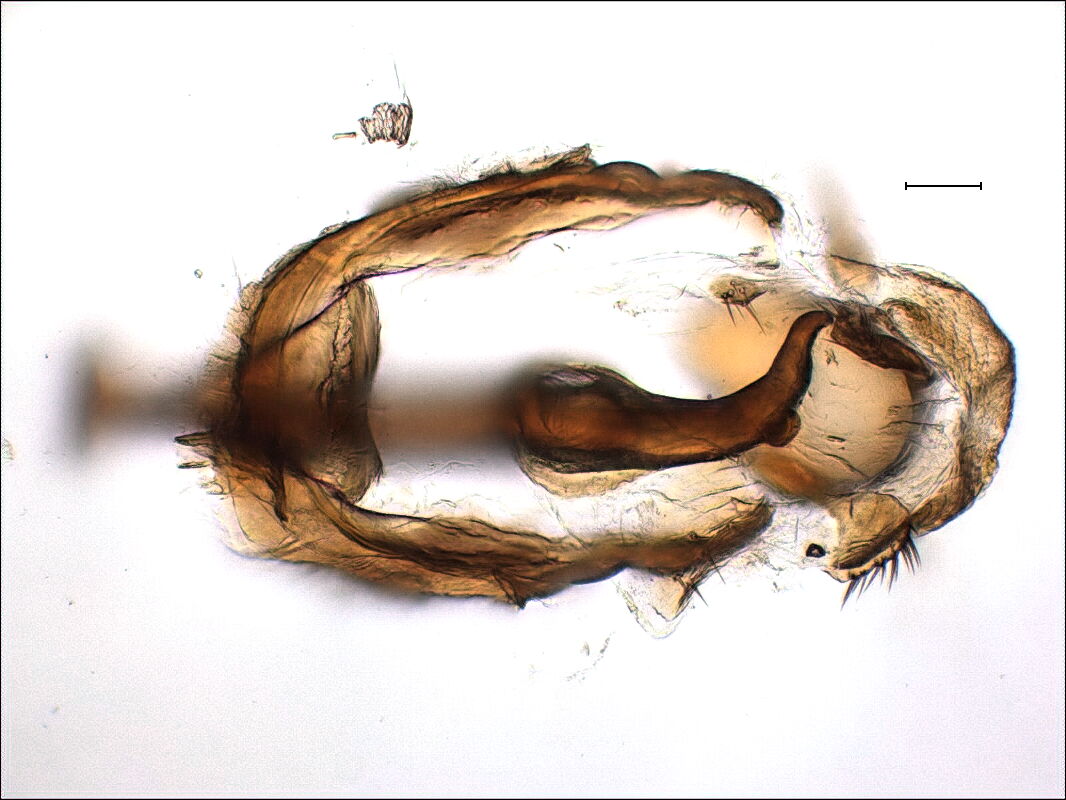
From the side view of the hypandrial complex on the left, we we
already get a first idea of its components: the ejaculatory apodeme
freely floating above, the anteriorly rounded aedeagal apodeme
rigidly connected to the hypandrial arms, and the black aedeagus
below. A membranous sheath covers the junction of aedeagus and
hypandrium and the postgonites (on the right). But in the ventral
view below (left side) the broad black aedeagus obstructs the view
on further detail. So we insert the dissection pin into the whole
between aedeagal apodeme and hypandrium and bend the aedeagus away
as far as possible (right side).
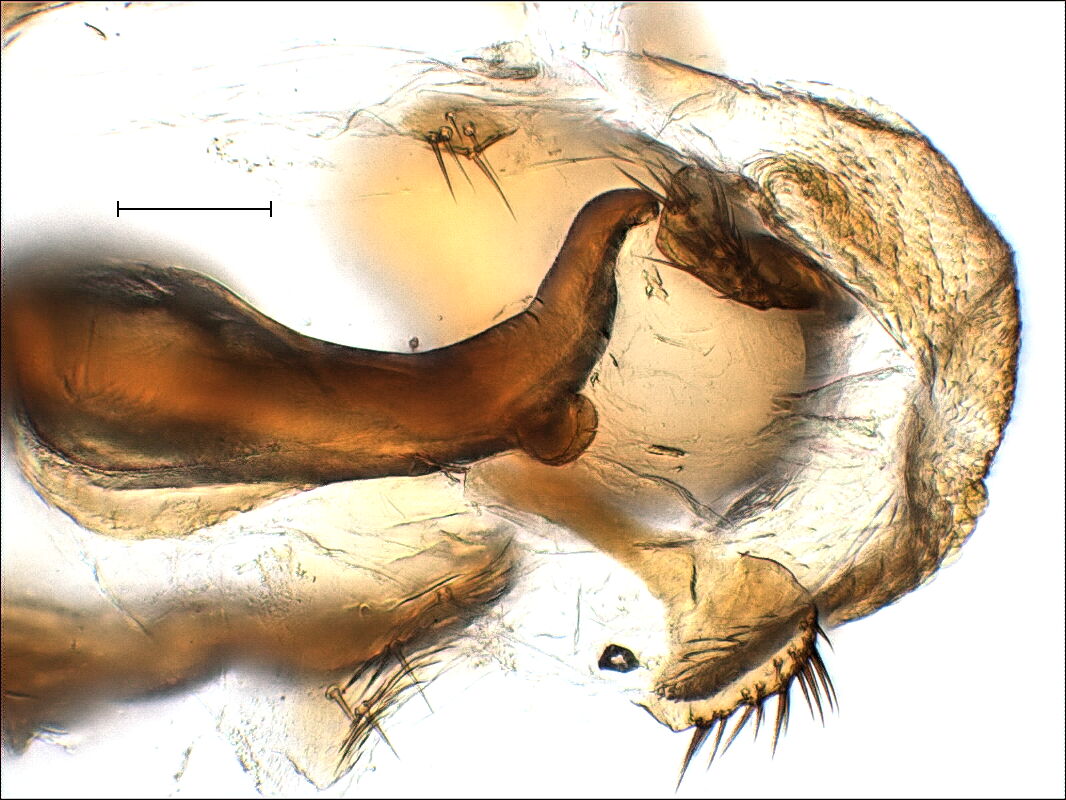
We see, that there is only a weak membranous connection between
aedeagus and hypandrium, and remove the aedeagus completely.
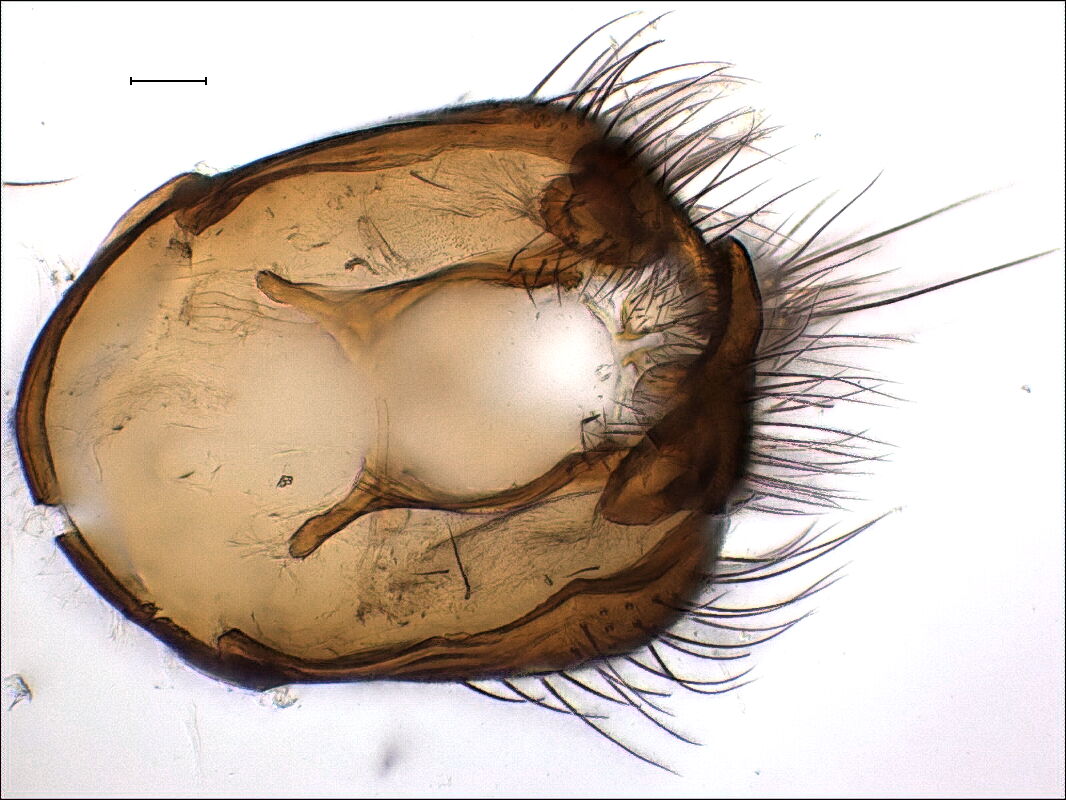
Now we can clearly distinguish the membranous sheath (on the right),
the asymmetric postgonites connected dorsally by bowl shaped
sclerite, the left pregionite which is reduced to a hairy slerotized
knob, and the right pregonite, which is just a hairy area on the
membrane. We pierce into the membrane between the postgonites and
pull away the sclerotized bowl together with the postgonites and the
membranous sheath.
As final step we separate the postgonites and, of course, the
surstyli after having documented which is the right and which is the
left one (on the upper right). You'll find the results in the
gallery (Suillia
fuscicornis)